Bumper Reflector Install DETAILED 2011 kia optima
I bought a set of these about 3 weeks ago and they came in last week. Got around to installing them yesterday and thought I would take pictures to do a DIY for everyone. This is not a very hard install, but can take up a good chunk of time if you are meticulous about wiring/soldering like I am. Took me 5 hours to complete from start to finish.
Required:
Drill w/ bits or multi bit
Razor blade/sharp knife
Channel lock pliers (small or medium should work)
Phillips head screwdrivers/bits (assorted)
Flat head screwdrivers or panel popper preferred
12mm socket and ratchet (1/2" drive)
10mm socket and ratchet (1/4" drive)
Masking tape
Soldering iron and solder
Electric tape (good quality... I use 3M)
Heat shrink tubing (can use electric tape instead)
Heat gun/lighter/matches/soldering iron (I use heat gun to shrink my shrink tubing)
36 feet total length of wire (LED reflectors come with some but I had to use more) 3 colors preferred
Flash light
Set of LED reflectors (purchased mine on ebay for around $95)
3 hours minimum if you are rushing/cutting corners and 8 hours maximum if you take your time
First thing is first. Test your new lights by connecting them to any 12v source (your car battery works fine) to be sure both the tail light function (white wire) and the brake light function (yellow wire) work. Test them by simply touching the ends of the wire to the battery terminals. Black is ground obviously. I use a 12v converter for bench testing automotive electronics/lighting but most of you (probably any) won't have that luxury. That's fine the car battery will work.
Secondly, tape under your tail lights so that when you pop them out they do not scratch the bumper.
The tape will slide under the tail light to protect your paint.
Next pop your trunk and remove the 2 "Christmas tree" style plastic retainers on the drivers side trunk liner and the 1 on the passenger side. Panel poppers work best for this but a pair of flat head screwdrivers can also be effective. Now remove your cargo mat (if equipped) and your trunk liner. Remove the 2 covers over the tail lights on each side. They simply squeeze together top and bottom. Now disconnect the wire harness from each tail light.
Now we need to remove the plastic trim piece surrounding the trunk striker that runs the length of the front of the trunk (if looking in). I didn't take pictures of the fastener locations but if you run into trouble (at any point) the KGIS diagrams can be very helpful. There are 2 Christmas tree plastic push pins and several of the plastic screw type retainers found all over the car. Now simply lift up. It will take some force as there are some white push clip retainers holding it from underneath that will pop out. Once you have the trim off check to be sure all the white plastic retainers came off with it. If not, pry them out from the trunk and re-insert them into the black trim panel so that when you go back to re-assemble you don't forget them.
Remove the 10mm bolts and plastic retainers holding the bottom of each side of the trunk liner on the bottom. You should now be able to fold each side of the trunk liner back into the rear of the trunk. I was able to get them both to stay in position behind the spare tire so they were out of the way.
We can now remove the tail lights. There are 3 10mm nuts and 1 clip retainer per side (it's hidden under a rubber plug). Remove the nuts from both tail lights. No need to mess with the retainer under the rubber plug... it will release with a decent tug of the tail lights. You may have to push from the inside or pull from the outside or some combination. Mine were on there pretty good but eventually the plastic retainers relinquished their grasp.
Inside the trunk there are 2 square push clips and 2 10mm bolts holding each side of the bumper onto the car body. Remove all the bolts first.
Above are the locations for the bolts and black square retainers. They are behind the wire harness. Before attempting to squeeze and release the black plastic retainers you must unscrew the 4 screws and 1 plastic screw retainer from each side of the bumper in the wheel well area. The top one holds the corner of the bumper to the body, 3 hold the wheel well liner to the bumper, and underneath the 1 plastic screw retainer holds the bottom of the liner to the bumper. Most of their locations are pictured below.
Note, if you are doing this with the wheels on like I was you may need a very stubby screwdriver and a small ratchet (1/4" drive) with a 1/4" socket on it to put a fillips screw driver bit into.
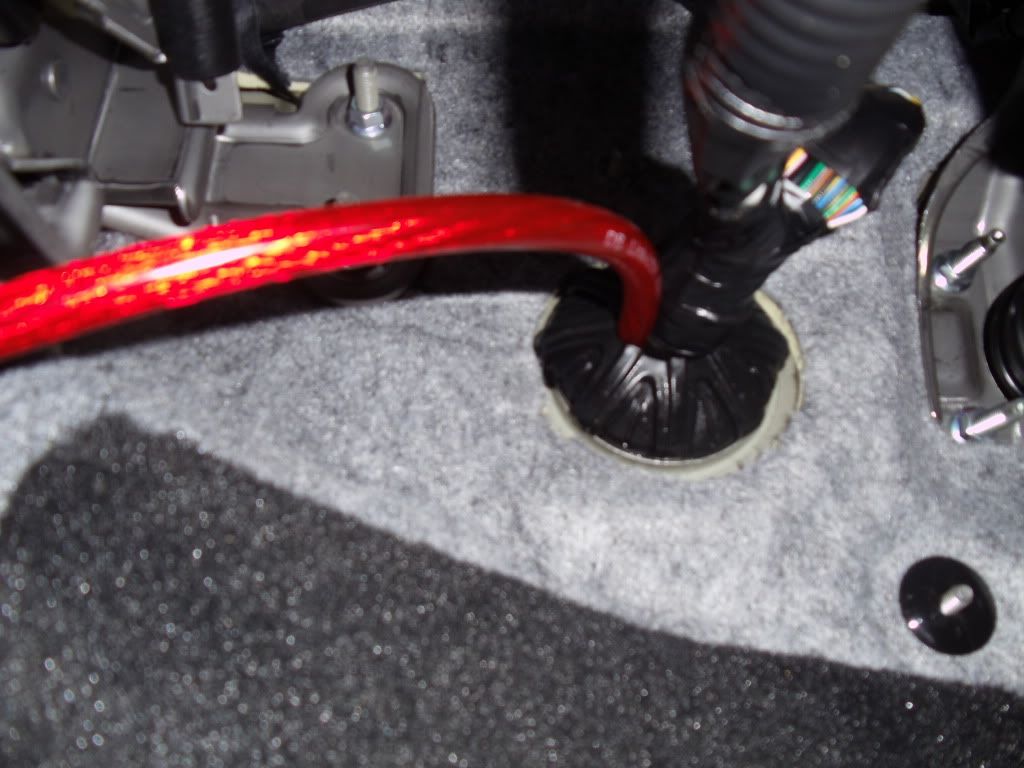
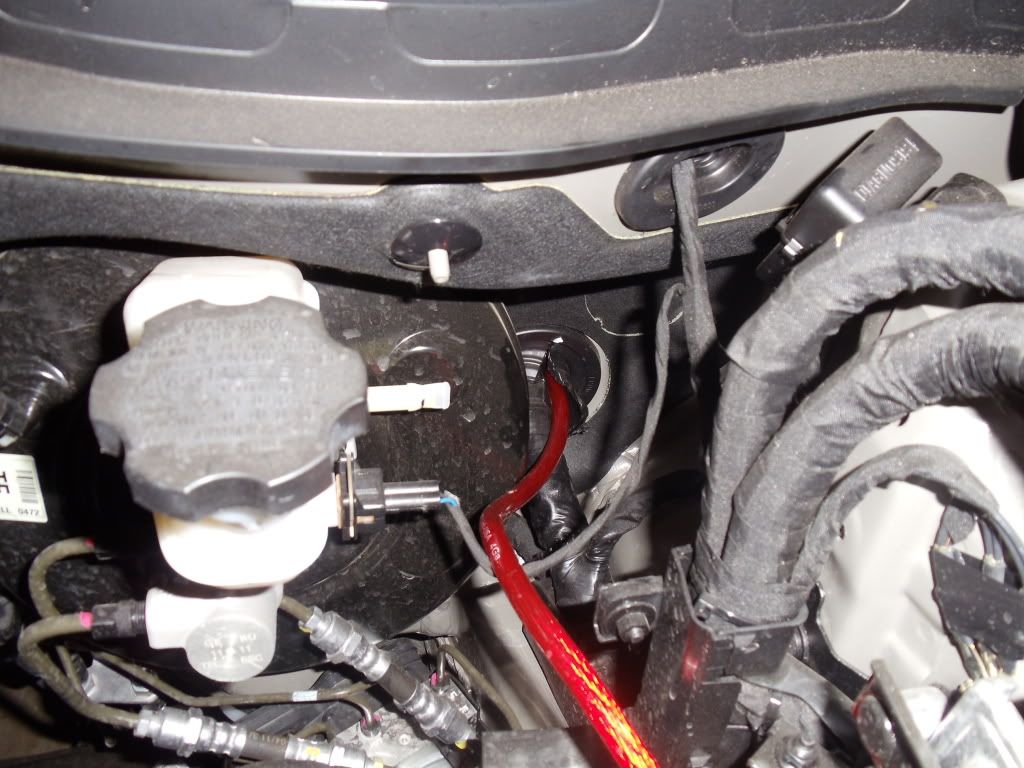
Now go back into the trunk with your pliers, squeeze and push (simultaneously) on the black retainers to pop them out. If you have long arms like I do you can squeeze with the pliers and pull the bumper away from the body at the same time. While you are in here go ahead and unplug the white plug that comes through the front of the trunk with a factory grommet. It is for the impact sensor attached to the bumper support. Feed the white plug and wire through the hole you pushed the grommet through.
There are also a couple of fasteners per side residing where the tail lights were that hold the top of the bumper cover to the body. Remove those.
Once you have each side of the bumper free get under the car with your 12mm and 1/2" driver ratchet (I found a 12mm ratcheting wrench to work better but are less common in everyone's tool boxes) and remove 2 12mm bolts from each side of the bumper supports. Sorry no pics of these but they are fairly obvious once you are under the car. After these are removed the bumper assembly is ready to come off.
This is a HUGE rear bumper, it really helps to have 2 people at this point just to avoid scratching paint and general frustration on your part. Each person should get a side of the bumper at the rear of the car and FIRMLY pull rearwards. The only thing holding the bumper is a series (3 per side) of metal compression clips pictured below along the rear of the body.
BTW... now is an awesome time to polish your exhaust tips. As you can see the wife took full advantage of all the working room.
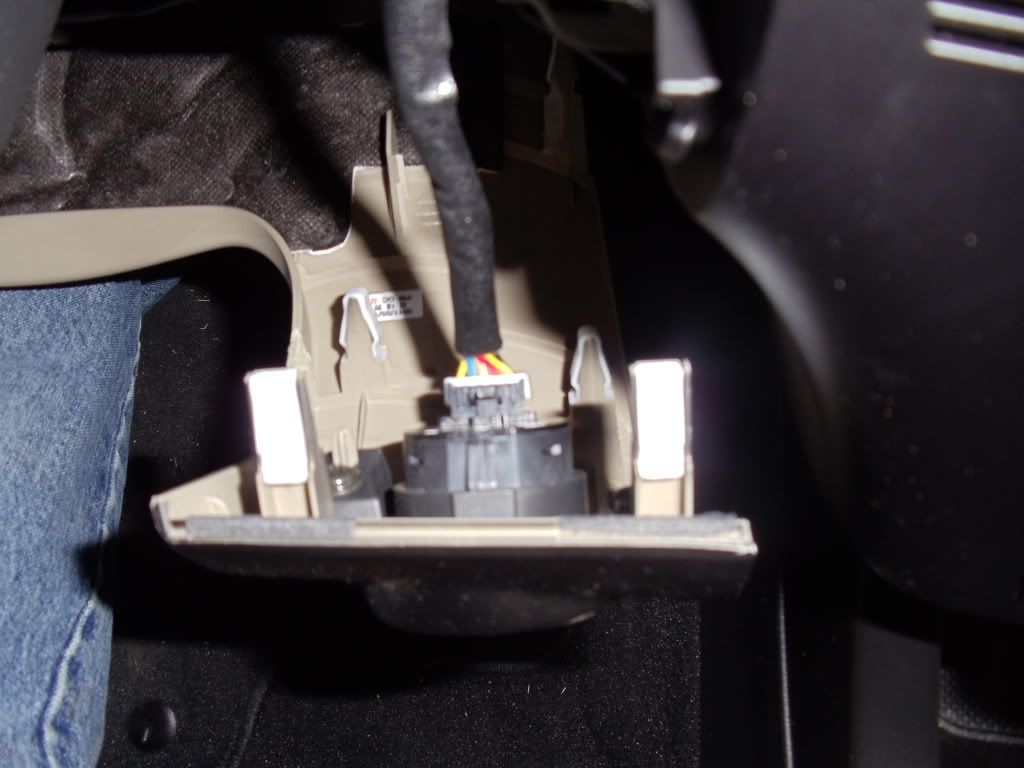
With the bumper set on a blanket/towels/etc you can now remove the bumper reinforcement by undoing the 4 plastic screw type retainers. 2 are under the bumper on the diffuser and 2 are up top. Move the reinforcement out of the way for now. Remove the 2 fillips head screws from each factory reflector and pop them out. Still with me? The new LED reflectors require that you drill 2 holes as pictured below. I used a multi-bit large enough to fit the harness plug into. I could have made the holes smaller since I ended up cutting the harnesses later anyway... but the holes were already drilled. Se la vie.
Install the new lights with the 2 (per side) factory screws. They will require some adjusting to get them to fit evenly. Take your time and you will get them in there nicely. They don't fit as well as the factory lenses but after some adjusting I give them an 8/10 for fitment. Go ahead and reinstall the bumper support onto the bumper cover with those 4 plastic screw retainers.
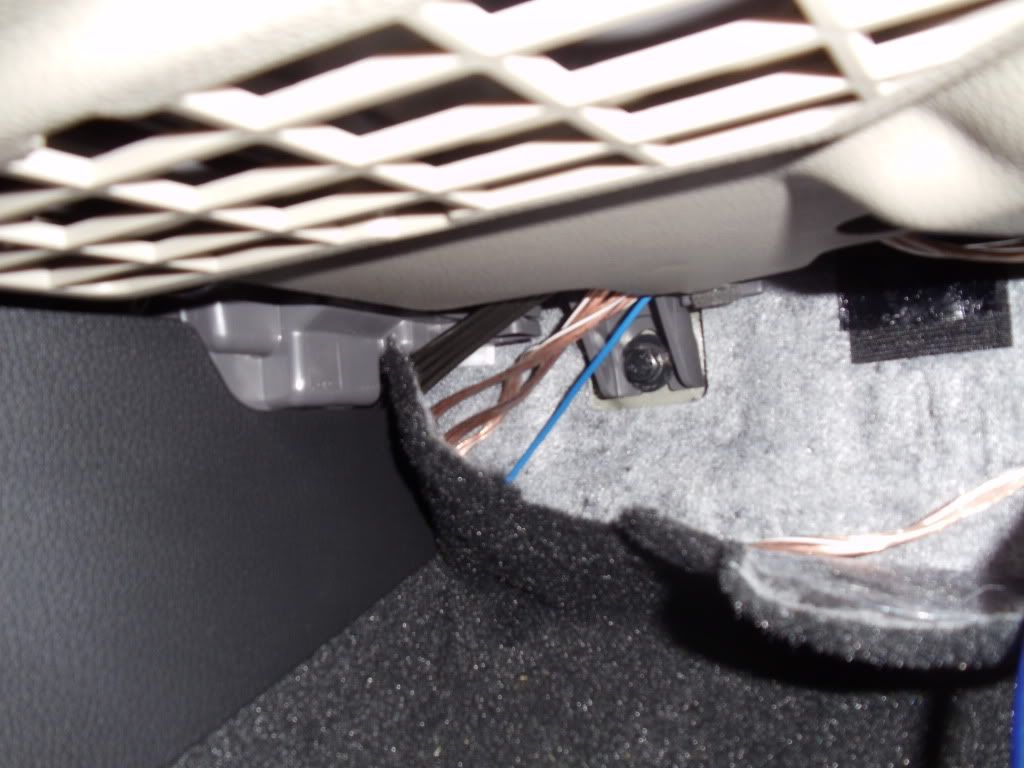
Now the fun part... wiring. I extended my wires through the factory impact sensor grommet so that everything would look and function like stock. By this I mean you can still disconnect the harnesses in the trunk and remove the bumper for servicing without having to cut wires. The kit comes with some wire but I found this to only be enough for the interior trunk runs. As such I left those harnesses alone and extended the wires/harness on the lights themselves. Having matching wire colors here is nice but not necessary. If keep track of your wires with labels all will be well. All my wiring is wrapped in electric tape to resemble the factory wiring harnesses. Below you can see the soldering/heat shrink/wire routing on the bumper.
To make the holes for your wires in your grommet use your razor blade or knife to make a hole just big enough to pass the wires through on each side of where the factory wire goes through. Remember not to solder your plugs back onto your extended wires or they will be difficult to get through the grommet and require you to make holes much larger than they need be.
With all that done it is time for the bumper to go back on. Again, it is VERY helpful to have a helper here. Installation is the reverse of removal. Take your time and line up all the clips and holes for bolts. Also be sure to push the wires and grommet back through the hole in the body or you will be pulling the bumper off again or fishing for them. Go ahead and install all the fasteners for the rear bumper. 2 per side where the tail lights were. 4 per side in the wheel well area. 4 12mm bolts underneath the car (bumper support). 4 per side inside the trunk (2 black clips and 2 bolts per side). Plug the impact sensor back in as well (white harness). If you start the car without it plugged in you might trip the airbag light which would require a trip to the dealer to reset.
You are almost done. Only thing left to do is the wiring in the trunk. I have included a diagram below from KGIS. Strip an inch of wire from the end of the LED wire harness that we set aside earlier. I went ahead and wrapped mine in electrical tape again to mimic the factory wire harnesses. Simply strip a small portion of insulation from each wire needed (brake lamp,ground, and tail lamp per side) and insert your 1" stripped ends of the corresponding wires on the LED harnesses. Yellow = brake lamp, White = tail lamp, and Black = ground.
This is the driver's side.
Here's what you will connect:
Driver's Side -> Yellow on LED harness to Green on tail light harness, White on LED harness to Green/Black on tail light harness, Black on LED harness to Black on tail light harness (there are 2, either one is fine)
Passenger Side -> Yellow on LED harness to Green on tail light harness, White on LED harness to Brown/Black on tail light harness, Black on LED harness to Black on tail light harness (there are 2, either one is fine)
With all that done go ahead and reinstall your tail lights. Plug the harness in and test your lights function properly. If they don't you have a break in a wire or wired the lights incorrectly. If you followed this up to this point... your lights will most likely be working properly.
Go ahead and install all the trunk trim in the reverse order it was removed. Pull the tape off the rear bumper. You are now done... sit back and have a beer. You should be left with the below.
Post any questions... will be happy to help.


Complete new Audio system Installed
Here is my thread on how to replace your H/U with aftermarket one and laying out the wires. Below are what was installed and where I got the items from
From Amazon:
MRP-F300 - Alpine 4-Channel 300 Watt V-Power Series Amplifier----for my 4 aftermarket speakers
Metra 70-7304 Wiring Harness for Select 2010-Up Kia and Hyundai Vehicles--- allow me to install aftermarket HU without cutting wires
Alpine SWE-1243 12" Subwoofer x2
Metra Axxess ASWC Universal Steering Wheel Control Interface--- allow me to maintain most of my controls
MRP-M500 - Alpine Monoblock 500 Watt RMS Power Amplifier--- power my 2 subs
Alpine SPS-610 6-1/2" 2-Way Type-S Series Coaxial Car Speakers---back speakers
DB Link FB428 2-Position Fuse Block--- going 4 gauge in and splitting with 2 8 gauge out
From Best Buy:
Metra-Installation Kit for 2011 and Newer Kia Optima Vehicles-Black-99-7345B--- allow for aftermarket HU installation
From Crutchfield:
Speaker Harnesses-- allow aftermarket speakers without cutting wires.
JVC KW-NT3HDT--- the HU
***Fist need to remove the trim
***Now remove the side panel
***Remove the 3 screws
***Now remove the 2 Screws on the bottom
***Pull off the panel now
***Remove the 4 plugs allowing you to completely remove the panel
***Now that panel is removed the hidden screw hold the small trim in place
***Now remove the small piece of trim
***Remove the 4 screws hold the odometers in place, but DO NOT REMOVE IT
***Remove the 4 screws holding the A/C controls in place, but DO NOT COMPLETELY REMOVE, just want it to hang down
***Now remove the screws holding the face plate for your H/U
***Once your face plate is removed you need to take off the A/C vent to install in your new aftermarket face plate
***Now we can FINALLY remove the 4 screws that's holding the old H/U in place
***Remove your old head unit and install the aftermarket wire harness
The wire harness is color coded and you can read the words on the wires as well. Wire up the harness to the harness from your new H/U.
****Here is a pic on how I wired up speakers wire that will the ran to my new AMP to power my 4 speakers
***Now be a good time to start running your speaker wires, amp wires from the H/U to the trunk of your car
Here is how I ran my speaker wires
***If you remove the trim here and pull back the rubber you can hide a great deal of wires
***To run the amp power wires I ran it through here to I don't have to drill any holes
I ran the wire just like I did with my speaker wires. Please note you CAN NOT RUN AMP WIRES NEAR SPEAKER WIRE, this will cause a lot of feed back when the RPM's are reved up.
*** I mounted my amp on my custom sub box for better ventilation, and access
***To install the door speakers just remove the 2 screws and pull on the door, and remove the cannon plug off and install your new speaker.
The Dash speakers I believe are wired with the front speakers, so all I had to do was install the bass blocker in seies to the speaker. Remove the face plate to install your new Dash Speaker
The system sounds awesome and only think left to do is build a custom sub box so I can have more trunk space. Here is a pic on how the H/U looks all installed